Extend Existing Entity
Overview
This guide teaches how to change one of the existing entities that are provided with the Mosaic Media Template. The guide describes how to expand the amount of information associated with an instance of the entity. This is done by expanding the database table to include an additional column and then providing a field in the details page to let an editor manage the data of that field.
See also: Create New Entity
Pre-Requisites
To follow along, you should have already completed the Mosaic Media Template setup. Instructions on how to set it up can be found in the README.md file contained in the Mosaic Media Template package.
Goal
This guide describes how to add a new file for a SEO Description to the movie
entity type. The editors can use that entity type to maintain an additional description
of the movie that can be used for search engine optimization. Once you’ve walked
through the guide, you should have enough information to add any field to any entity
type you want.
Adding a New Field
On a high level, the task can be split into two parts:
-
Adding the new field to the backend API to make it possible to store and persist the data.
-
Adding the new field to the media workflows to have a UI for the editors to work with and fill in and edit the data.
Both of these processes are further discussed below.
Adding the New Field to the Backend API
Let’s start by adding the backend support for the new field. Note that to accept new information, you need to add a column to the existing table in the database of the media service. This way, the information can be stored there.
To add a new field to the backend API:
-
Navigate to the
current.sqlfile. It is located underott-template-version/services/media/service/migrations. -
This file is mostly empty, except for some comments. You can write code inside this file to alter existing tables as well as create new tables. Use the
ax-add-nullable-columnsnippet. If you type it into the editor, you should see an auto-complete suggestion: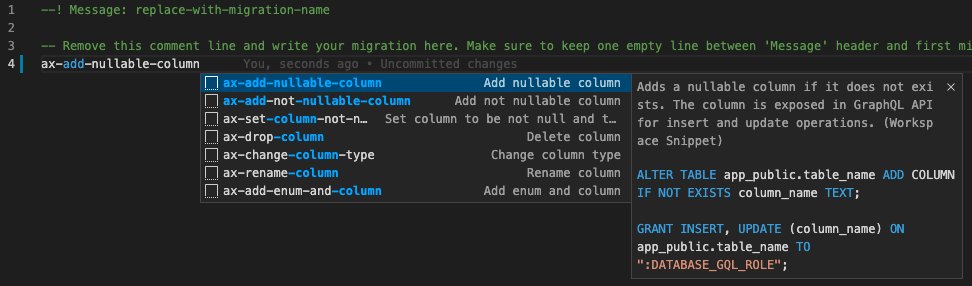 Tip
TipThere are many more snippets you can use to auto-generate SQL statements that could be useful for your use cases. To explore them, start typing ax-and then have a look at their descriptions.-
Hitting tab while this suggestion is highlighted, inserts the following code template:
ALTER TABLE app_public.table_name ADD COLUMN IF NOT EXISTS column_name TEXT;

GRANT INSERT, UPDATE (column_name) ON app_public.table_name TO ":DATABASE_GQL_ROLE";
The first line adds a column to the table if it does not exist.
The second line enables the GQL role toINSERTandUPDATEthe column, so PostGraphile includes it in the respective GraphQL mutations.TipMake sure that all the Visual Studio Code extensions recommended by the solution are installed. Without them, you might not see the auto-complete suggestions.
-
-
In the template that you just inserted, you must now input the name of the table which you are changing. This guide refers to the
moviestable as an example. -
Next, name the column that you are adding, e.g.
seo_description. The data type of the column, can stayTEXT.TipThe snippet defines parameters for these values. You can use the TABkey to navigate between the parameters of the snippet and conveniently fill in the details mentioned above. -
When finished, you end up with the following document:
--! Message: replace-with-migration-name -- Remove this comment line and write your migration here. Make sure to keep one empty line between 'Message' header and first migration line to properly name future migration file. ALTER TABLE app_public.movies ADD COLUMN IF NOT EXISTS seo_description TEXT; GRANT INSERT, UPDATE (seo_description) ON app_public.movies TO ":DATABASE_GQL_ROLE"; -
After saving that file, the service reboots and applies the migrations listed in the
current.sqlfile to the database. This makes the new field available in the GraphQL API of the media service immediately.
Adding a New Field to the Media Workflows
Now that there is a new property in the backend API, the editor should be able to
enter information for it, using the Management System UI. Next, learn how to add
a new field to the details station for movies. The code that powers this station
is inside the folder services/media/workflows/src/Stations/Movies/MovieDetails.
To add a new field to media workflows:
-
First, make sure that your new property is loaded by the station.
-
Update the
MovieDetails.graphqlfile and add the newly createdseoDescriptioncolumn into theMoviequery. Simply add its name under the names of the other fields.services/media/workflows/src/Stations/Movies/MovieDetails/MovieDetails.graphqlquery Movie($id: Int!) { movie(id: $id) { title originalTitle ... publishedUser seoDescription # <--- add this line } ... }TipWhen starting to type the property name, the solution should start auto-completing the property name. If this does not show up or the line gets underlined in red, you might need to run the >Apollo: Reload schemaVisual Studio Code command once (using the Command Palette) to make the Apollo extension aware of the changes to the GraphQL schema, applied in the previous step.
-
-
Execute the command
yarn codegenfrom theservices/media/workflowsfolder. This regenerates the Typescript typings for your query, which makes Typescript aware that the query now also returns aseoDescriptionproperty. -
Now, you can continue with the actual MovieDetails station component to add the new property to the form. Open the file
services/media/workflows/src/Stations/Movies/MovieDetails/MovieDetails.tsx.-
This file contains the definition of the
MovieDetailscomponent, which is rendered when a user navigates to the/movies/{id}route. For the time being, simply ignore most of the code. You are only interested in the section that defines theFormcomponent, which defines the input fields that the station shows. You can find it, for example, by searching forconst Form:.const Form: React.FC<{ genreOptions?: string[] }> = ({ genreOptions }) => { ... return ( <> <Field name="title" label="Title" as={SingleLineTextField} /> ... <Field name="studio" label="Studio" as={SingleLineTextField} /> </> ); }; -
Add your input field at the end of the form, right below the studio input field.
-
Enter the following under the studio field:
const Form: React.FC<{ genreOptions?: string[] }> = ({ genreOptions }) => { ... return ( <> <Field name="title" label="Title" as={SingleLineTextField} /> ... <Field name="studio" label="Studio" as={SingleLineTextField} /> <Field name="seoDescription" label="SEO Description" as={TextAreaField} /> {/* <--- add this line */} </> ); }; -
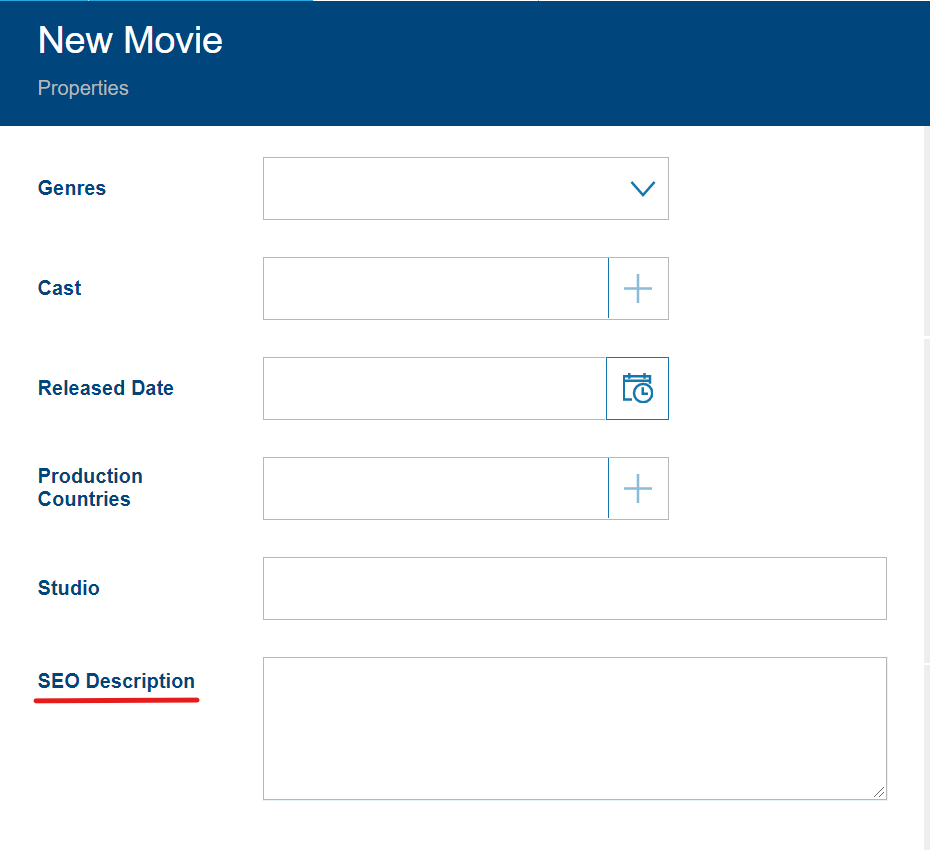
This creates a new
TextAreaFieldfield in the form which hasSEO Descriptionas its label. Several other field types can be used, such asSingleLineTextFieldandDateTimeTextField, etc. It is data-bound to theseoDescriptionproperty of the station data.NoteThe saveDatahandler of the station, which is called by theDetailscomponent whenever the data needs to be persistant (e.g. if the user changed values and leaves the station) is already implemented to send update mutations for all changed movie properties. No need to change anything there. If your property is not a direct property of the movie but, for example, a related one that requires a separate mutation to be executed, you would need to add this logic to thesaveDatahandler.
-
-
After saving all the changes, the workflows project automatically rebuilds itself and starts serving your changed station.
Results
Follow the steps below to check whether everything works:
-
Open the Management System in your browser: navigate to
http://localhost:10053and click the Movies tile to open the respective explorer view.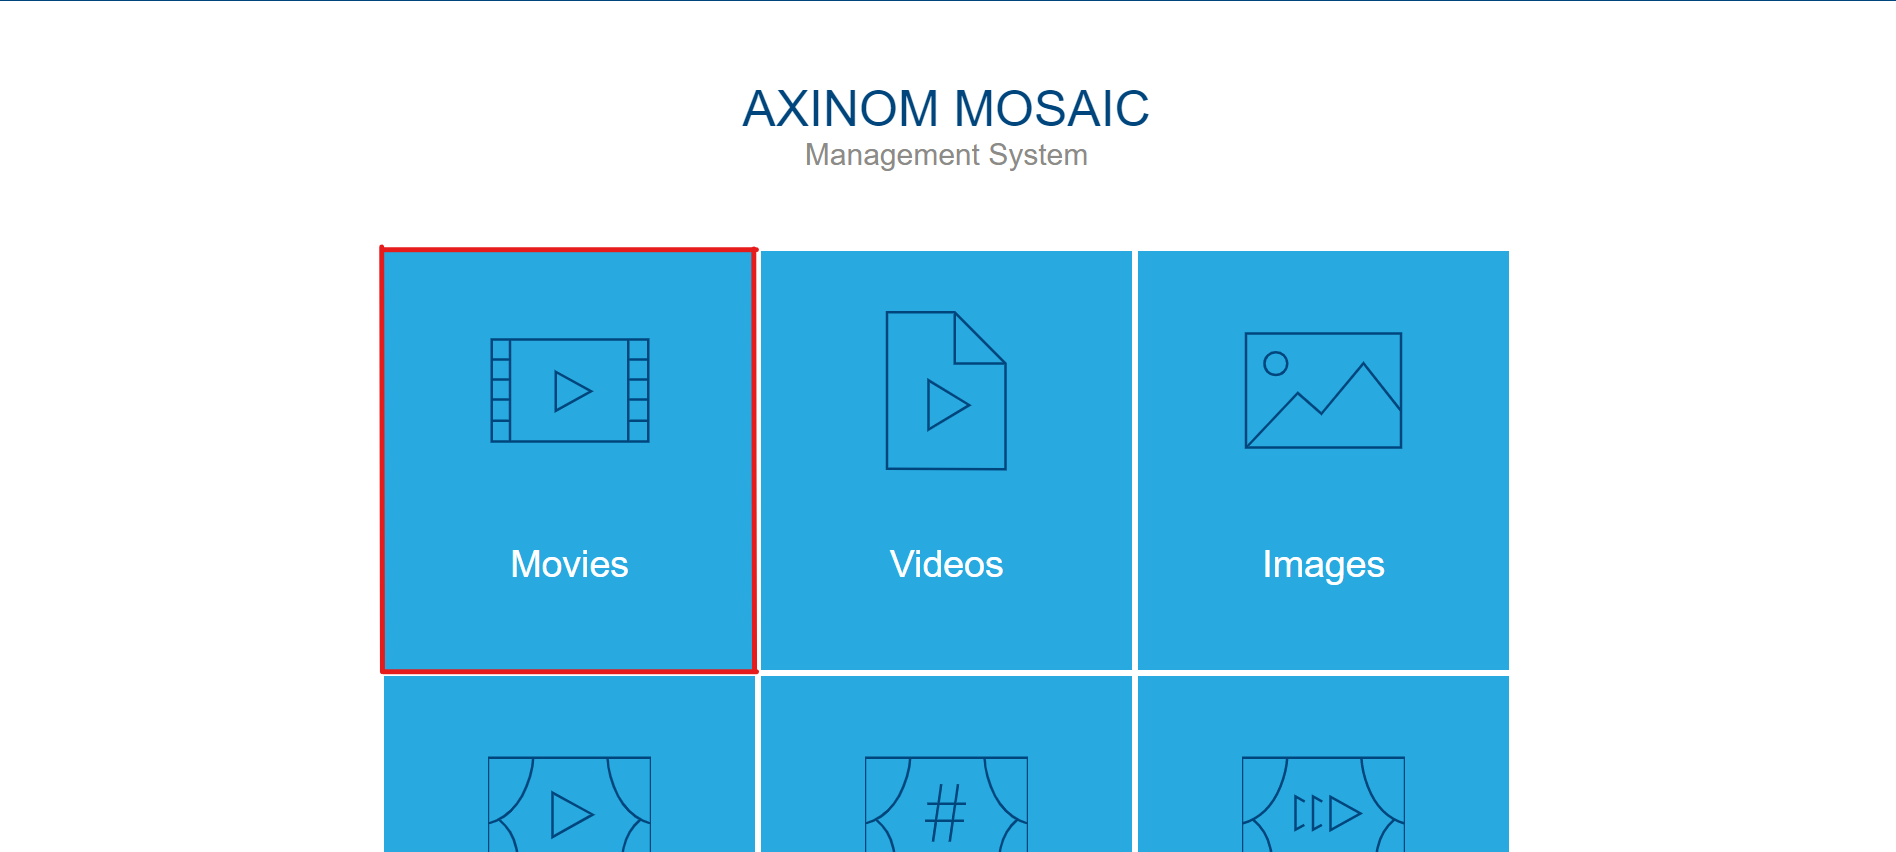
-
After selecting the movies tile, go to the details page.
-
You can reach the details page by either editing an existing movie if you have one already created.
-
If you don’t have any movies, create a new movie.
-
-
On the the details page, you should see that a new field has been added to the bottom of the page.
-
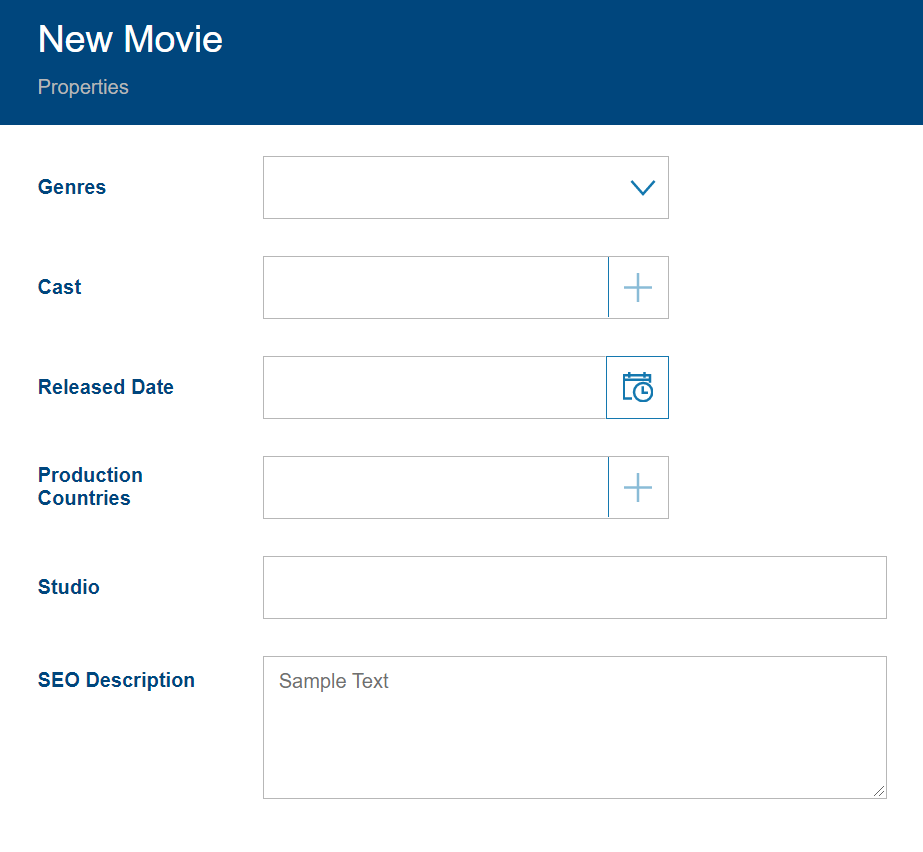
Enter some information and navigate away from the page.
-
Come back to the page. You should see that the text in the field that you just implemented, is still there.
-