Encode Video using UI
In this section we will use the Mosaic Management System (you can find the URL from the My Mosaic section) to encode a video.
The basic steps to encode the first video include:
-
Create Storage for an Input Storage for Axinom Encoding (this is where the source material will be uploaded to) and an Output Storage (this is where Axinom Encoding) will store the encoding results.
-
Set up an Acquisition and a Publishing Profile.
-
Set up a Processing Profile.
-
Upload a video to the Input Storage (use a subfolder for each video).
-
Start encoding. Wait until encoding is finished.
-
Preview encoded video.
Create Storage
The simplest way to create a Storage is using a Mosaic Hosting Service.
Follow instructions under Storage with Mosaic Hosting Service.
|
Note
|
Make sure to allow "Public Read Access" for the video-output container. Otherwise, you won’t be able to play the encoded video.
|
With a few clicks you will get a Storage Account in Microsoft Azure, which you can use from Axinom Mosaic, but also directly using tools such as Azure Storage Explorer.
You should now have everything to set up an Acquisition and a Publishing Profile.
|
Note
|
Of course, you can use an existing Storage Account in Microsoft Azure or an S3 Bucket in AWS with Axinom Encoding. See the links below. |
Setup Profiles.
Acquisition profile and publishing profile
Log in to your Mosaic Management System and follow instructions under Set up Encoding Profiles. As a storage provider choose "Microsoft Azure". All the required configuration (such as, account name, account key, SAS token) you can copy from the previous step (Storage properties).
Your secrets, such as your account key, shall be entered encrypted (with a certificate of Axinom Encoding), so that only Axinom Encoding can access your storage. To encrypt credentials, use Credentials Protection Tool.
Processing profile
Log in to your Mosaic Management System. You will find Processing Profiles under Settings / Video Encoding.
You can create a new profile or edit the DEFAULT profile. The properties here impact the encoding process. Check Set up Encoding Profiles, section "Processing Profile" for their meaning.
We recommend for the start leaving all values at their defaults. You can experiment with them later.
Upload a video
Prepare a short video for the test. If it is short (just 1-2 minutes) you save time on all the copying and processing operations.
Upload the video to your Input Storage. Following the example above, take the container video-input, create a subfolder for your video and upload the .mp4 file there. Just a single .mp4 file is enough.
To upload a file to your storage you can use a tool such as Azure Storage Explorer.
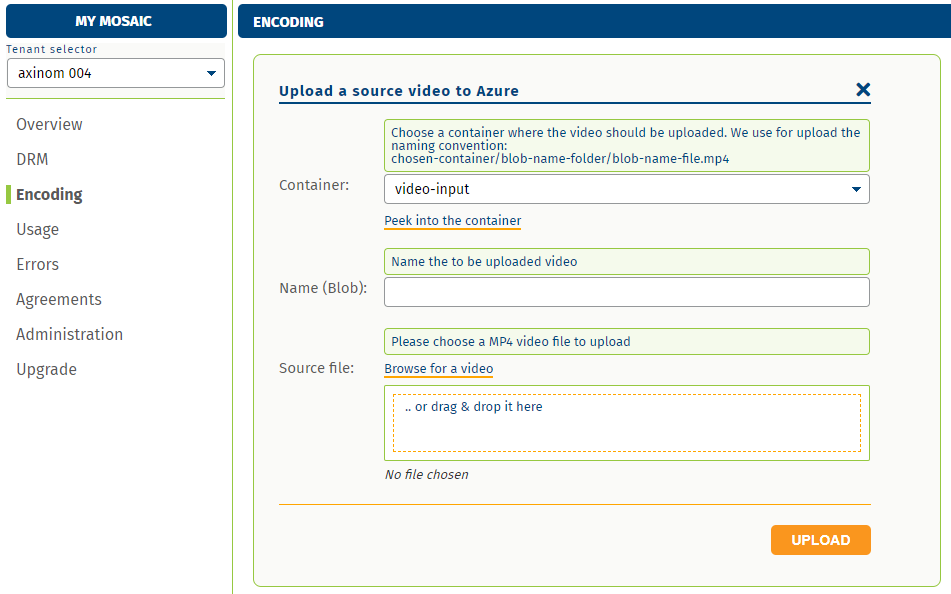
Alternatively, you can upload files directly in Axinom Portal. Go to My Mosaic / Encoding and select "Upload a Source Video". This module uploads files to your storage previously created with the Mosaic Hosting Service.
Start encoding
To start encoding follow the steps below:
-
Log in to your Mosaic Management System.
-
Go to "Videos", then "New". You will get a list of folder in your configured Input Storage.
-
Select the folder with your video
-
Click Start encoding.
Encoding process takes some time (the longer the video, the longer the process). You can observe the progress looking at the logs, accessible from the respective station.
Preview encoded video
Once encoding is finished, you can copy the link to the DASH manifest and play it with any DASH-capable video player.
For instance, you can go to Axinom test player under https://vtb.axinom.com, paste the link to DASH Stream URL and click "Load Stream".
The video playback should start.
If you successfully reached this point, you can proceed and apply protection to your video.