Configure Identity Providers
The Management System uses the Mosaic Identity Service to enable editors to log in and perform their editorial work. The Identity Service supports a range of OAuth 2.0 Identity Providers. Each of them can be configured and enabled so they could be available as a login option in the Management System.
This configuration needs to be performed in the Mosaic Admin Portal by an Administrator of the respective Tenant.
Enabling Google IDP
Google IDP can be enabled by either using a built-in Google IDP configuration or by creating a custom Google IDP configuration.
Built-in Google IDP
Google IDP will be enabled using a pre-configured Google OAuth 2.0 client which is managed by Axinom. This approach has the benefit of not having to create and maintain a Google OAuth 2.0 client on your own. Configuration settings of the OAuth 2.0 client such as authorized redirect URIs are pre-configured and cannot be altered.
Configuration
To configure Google IDP using the built-in Google IDP configuration, follow the steps below:
-
Log in to the Mosaic Admin Portal.
-
Locate the environment you would like to configure.
-
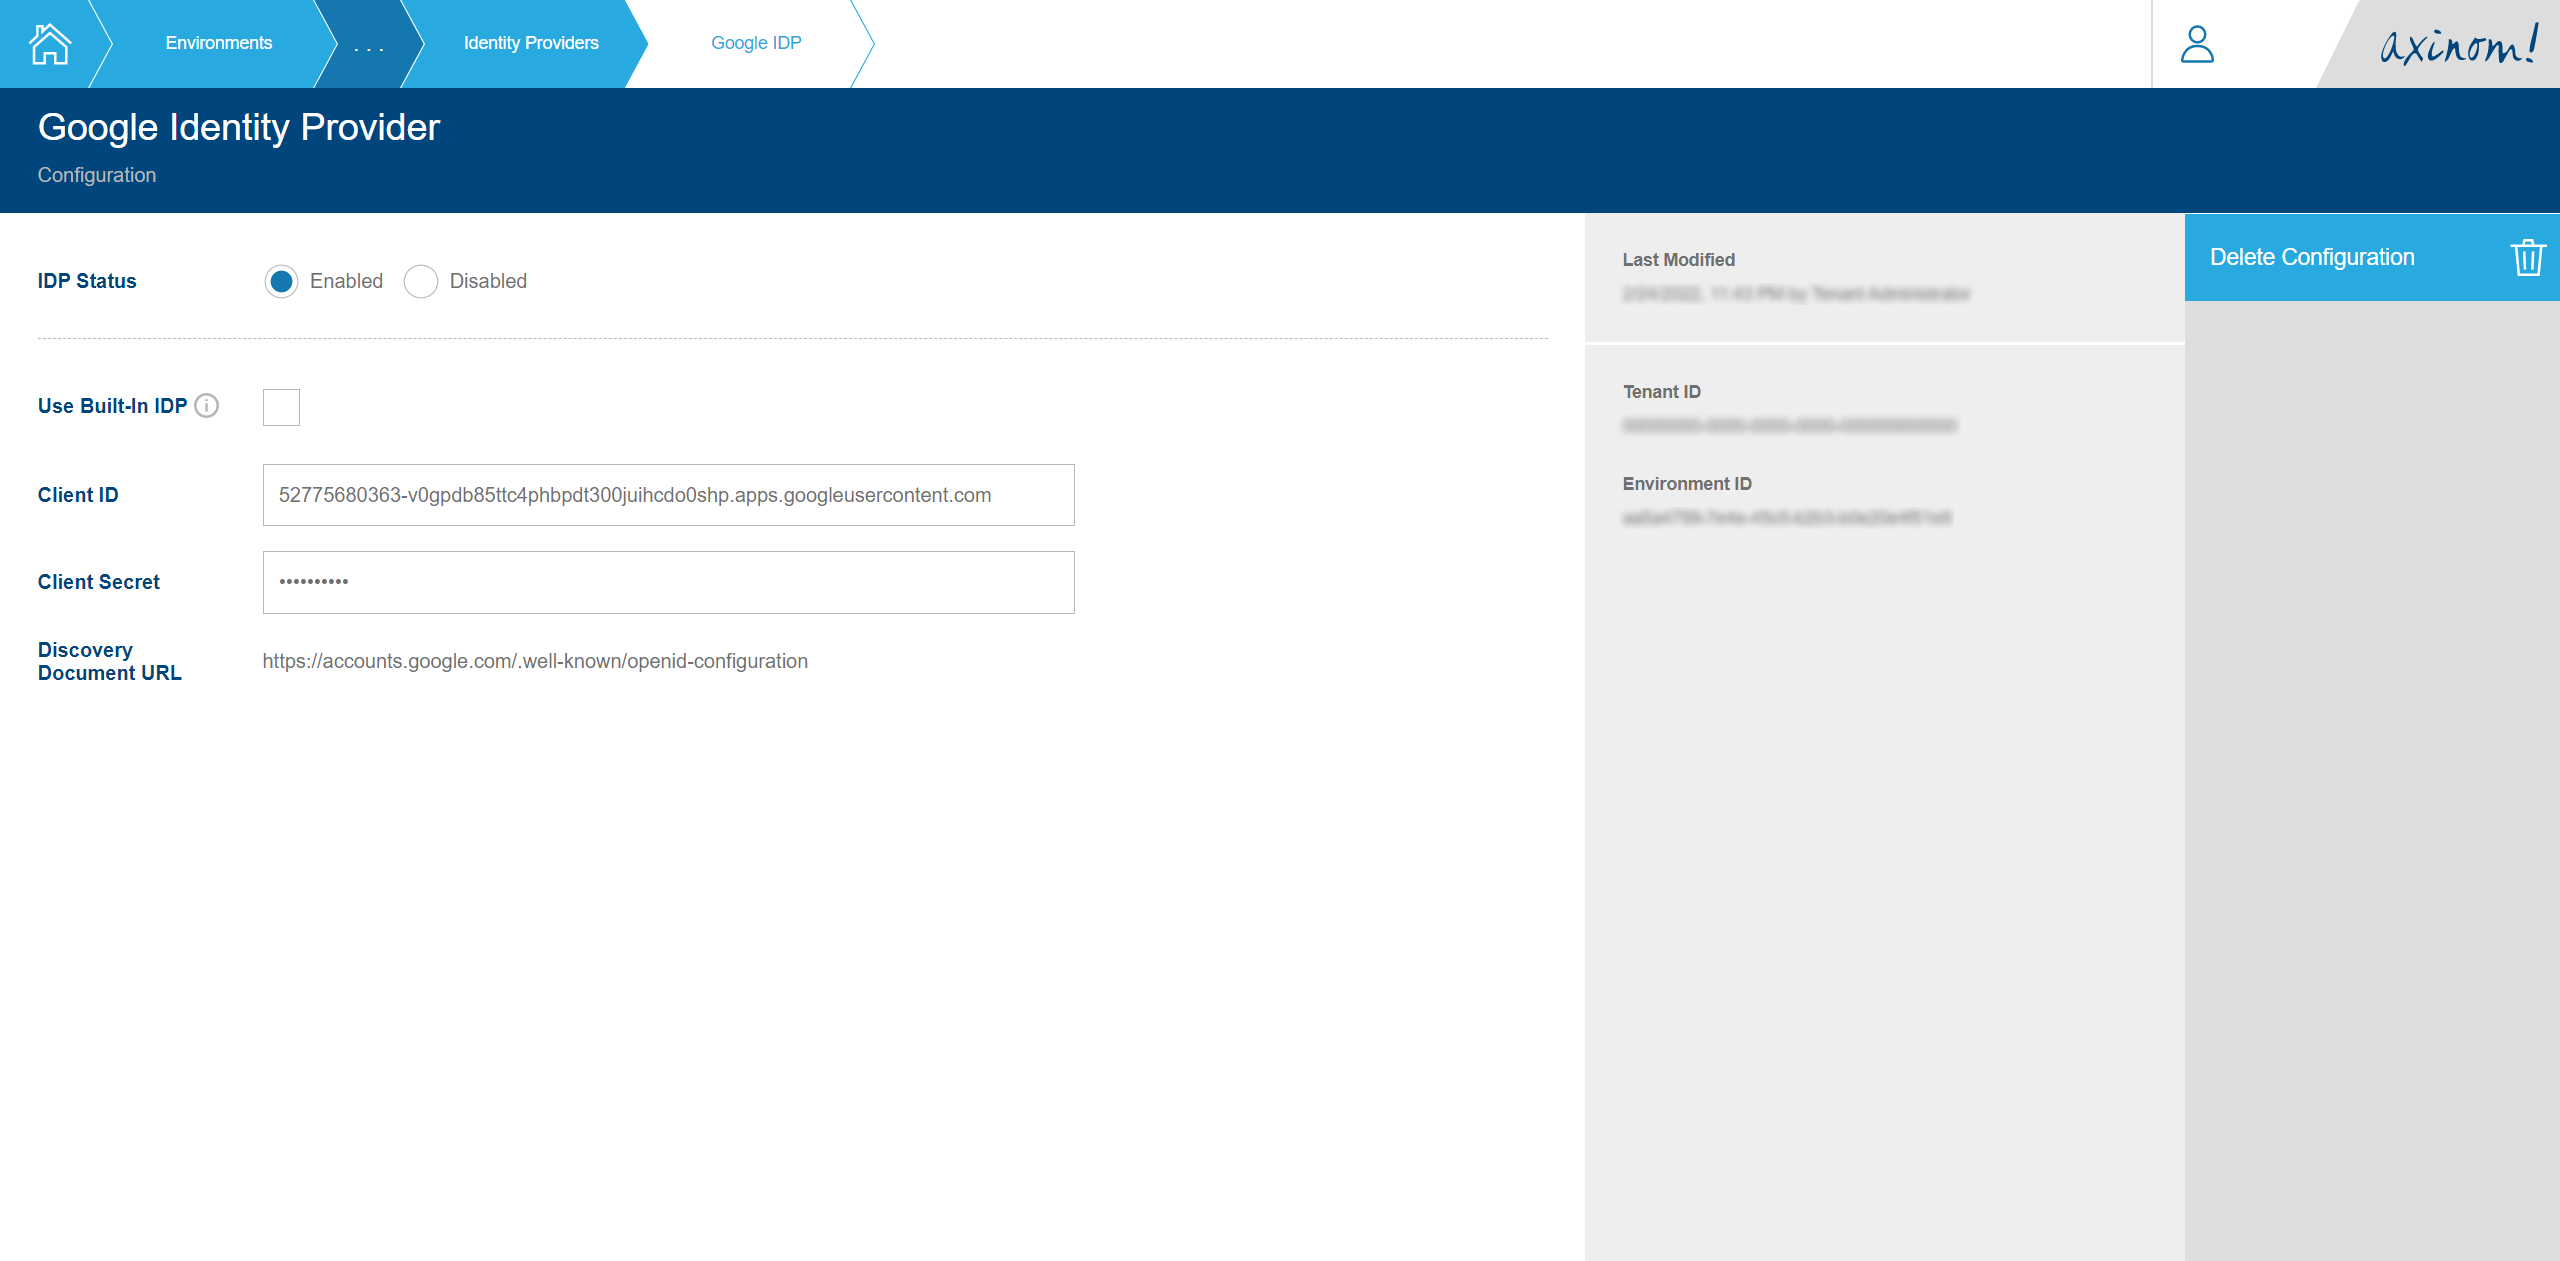
Navigate to the Google IDP configuration station within the Identity Service Configuration.
-
Select
Use Built-In IDPoption. -
Once this is saved, refresh the Management System to start using the newly configured Identity Provider.

Custom Google IDP
Google IDP will be enabled using a Google OAuth 2.0 client which is managed by you. This approach gives more flexibility because configuration settings of the OAuth 2.0 client can be managed by your own.
Pre-Requisites
You first need to register a Google OAuth 2.0 client and obtain the credentials for it. You can do it directly in the Google Cloud Console. The steps are included in Google documentation.
It’s important to configure the correct Authorized Redirect URIs as they need
to be whitelisted to receive the Authorization Code from the Identity Provider.
See below for the Redirect URIs that must be allowed for the Identity Service to
function correctly.
Configuration
To configure Google IDP using a custom Google IDP configuration, follow the steps below:
-
Log in to the Mosaic Admin Portal.
-
Locate the environment you would like to configure.
-
Navigate to the Google IDP configuration station within the Identity Service Configuration.
-
Paste the
Client IDandClient Secretvalues of the Google OAuth 2.0 client created previously and save the changes. You can use the status field in the future to temporarily disable the IDP without losing the already saved information. -
Refresh the Management System to start using the newly configured Identity Provider.
Enabling AzureAD IDP
Pre-Requisites
You first need to register a Microsoft AzureAD Application and obtain the credentials for it. You can do it directly in the Azure Portal. The steps you then need to take are included in Microsoft Azure documentation.
It’s important to configure the correct Redirect URIs as they need to be whitelisted
to receive the Authorization Code from the Identity Provider. When choosing the
platform to configure the Redirect URIs, the Web platform must be chosen on Azure.
See below for the Redirect URIs that must be allowed for the Identity Service to
function correctly.
It is also possible to control which users and groups are allowed to log in using the AzureAD Identity Provider. You should configure this in the Azure Portal. The steps are included in Microsoft Azure documentation.
Configuration
To configure AzureAD IDP:
-
Log in to the Mosaic Admin Portal.
-
Locate the environment you would like to configure.
-
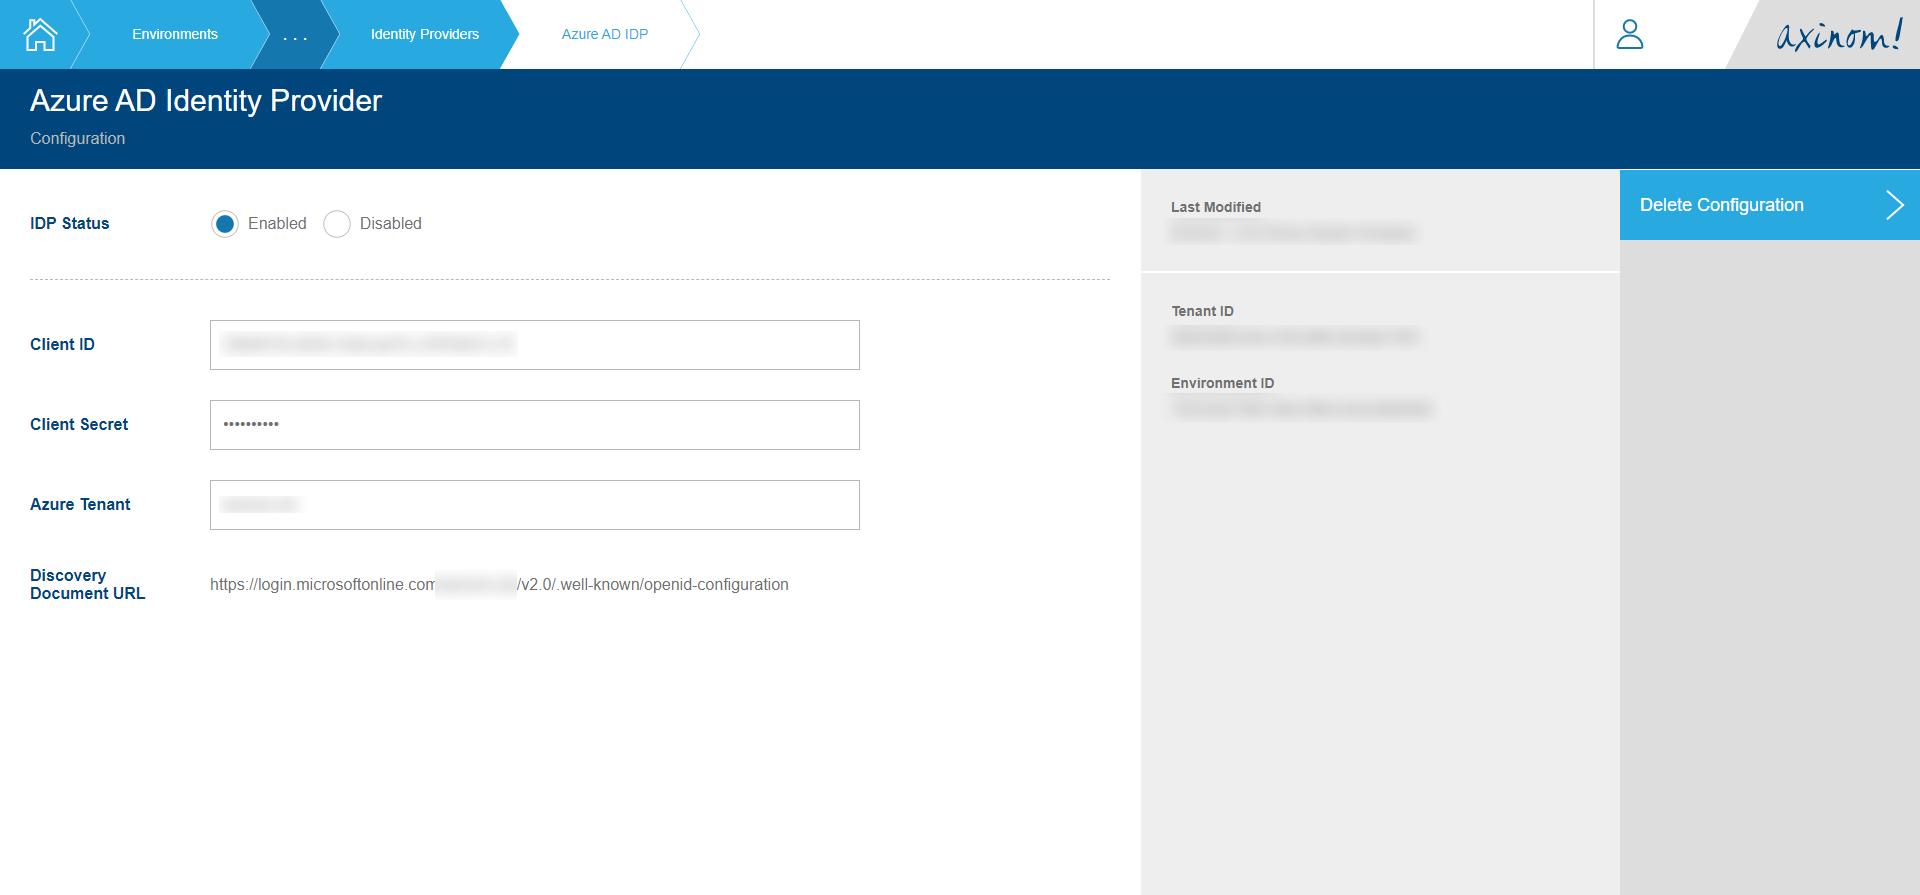
Navigate to the AzureAD IDP configuration station within the Identity Service Configuration.
-
Paste the
Client IDandClient Secretvalues of the Azure Application created previously. -
The value for the
Azure Tenantcan be set depending on the mode of authentication you desire as listed in the table below (the table is extracted from Microsoft documentation).Azure Tenant Description common
Users with both a personal Microsoft account and a work or school account from Azure AD can sign in to the application.
organizations
Only users with work or school accounts from Azure AD can sign in to the application.
consumers
Only users with a personal Microsoft account can sign in to the application.
8eaef023-2b34-4da1-9baa-8bc8c9d6a490orcontoso.onmicrosoft.comOnly users from a specific Azure AD tenant (whether they are members in the directory with a work or school account, or they are guests in the directory with a personal Microsoft account) can sign in to the application. Either the friendly domain name of the Azure AD tenant or the tenant’s GUID identifier can be used. You can also use the consumer tenant,
9188040d-6c67-4c5b-b112-36a304b66dad, in place of the consumers tenant. -
Finally, change the
IDP StatustoEnabled. You can use the status field in the future to temporarily disable the IDP without losing the already saved information. -
Once this is saved, refresh the Management System to start using the newly configured Identity Provider.
Redirect URIs to be Allowed
The following redirect URIs must be whitelisted by the Identity Provider for the OAuth 2.0 Authorization Code flow to work correctly. Please consult the documentation of the respective Identity Provider to see how they can be configured.
-
http://localhost:10505/auth/callback-
The localhost URL is only needed if you intend to run the Management System workflows on your localhost, such as for development purposes. It is recommended not to use this URL for other purposes.
-
See also: